In this issue, using CLIP STUDIO PAINT, we will introduce the three main themes of “how to export without fail”: the flow from completion of the manuscript to export, settings, and items to pay attention to.
・I don’t know how to save data for submission.
・I cannot save the data with the color I expected.
・After saving the data, the size changed and the text was cut off.
CLIP STUDIO PAINT has two export methods: individual export and batch export.
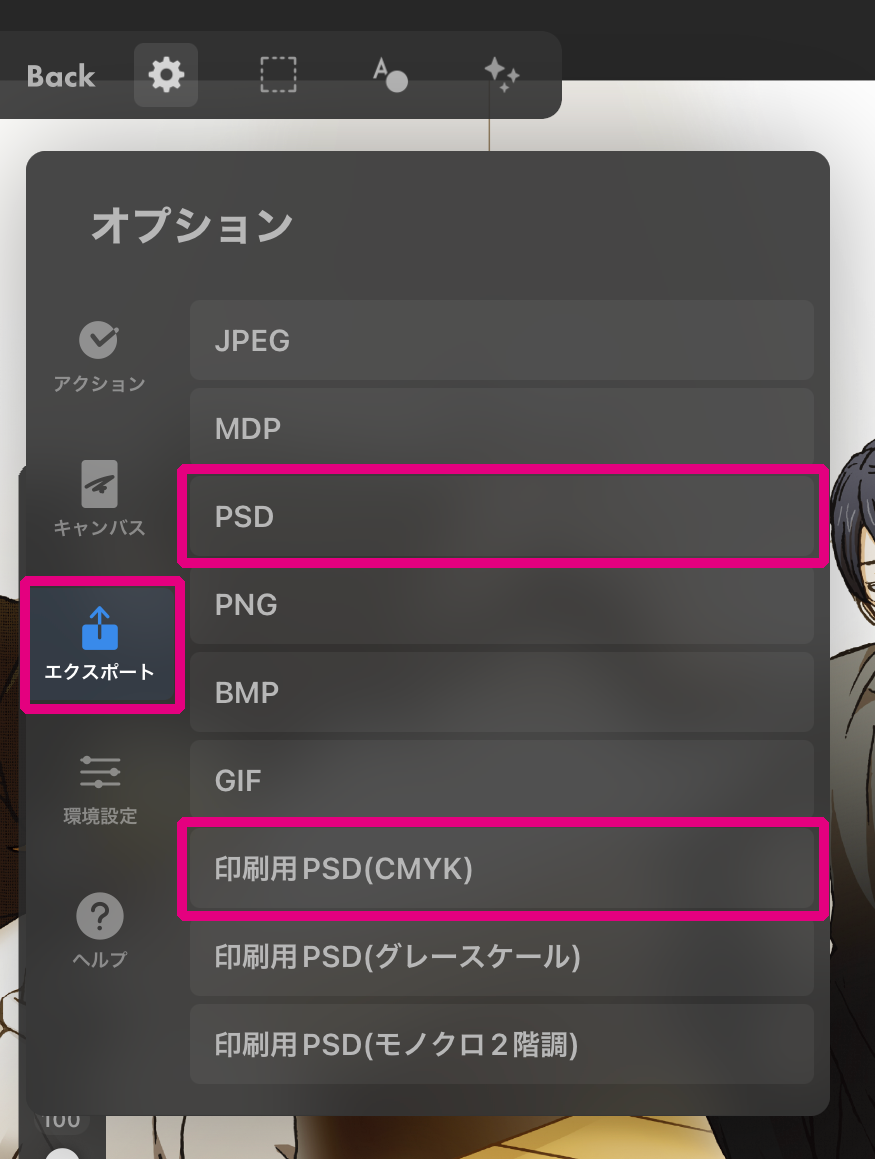
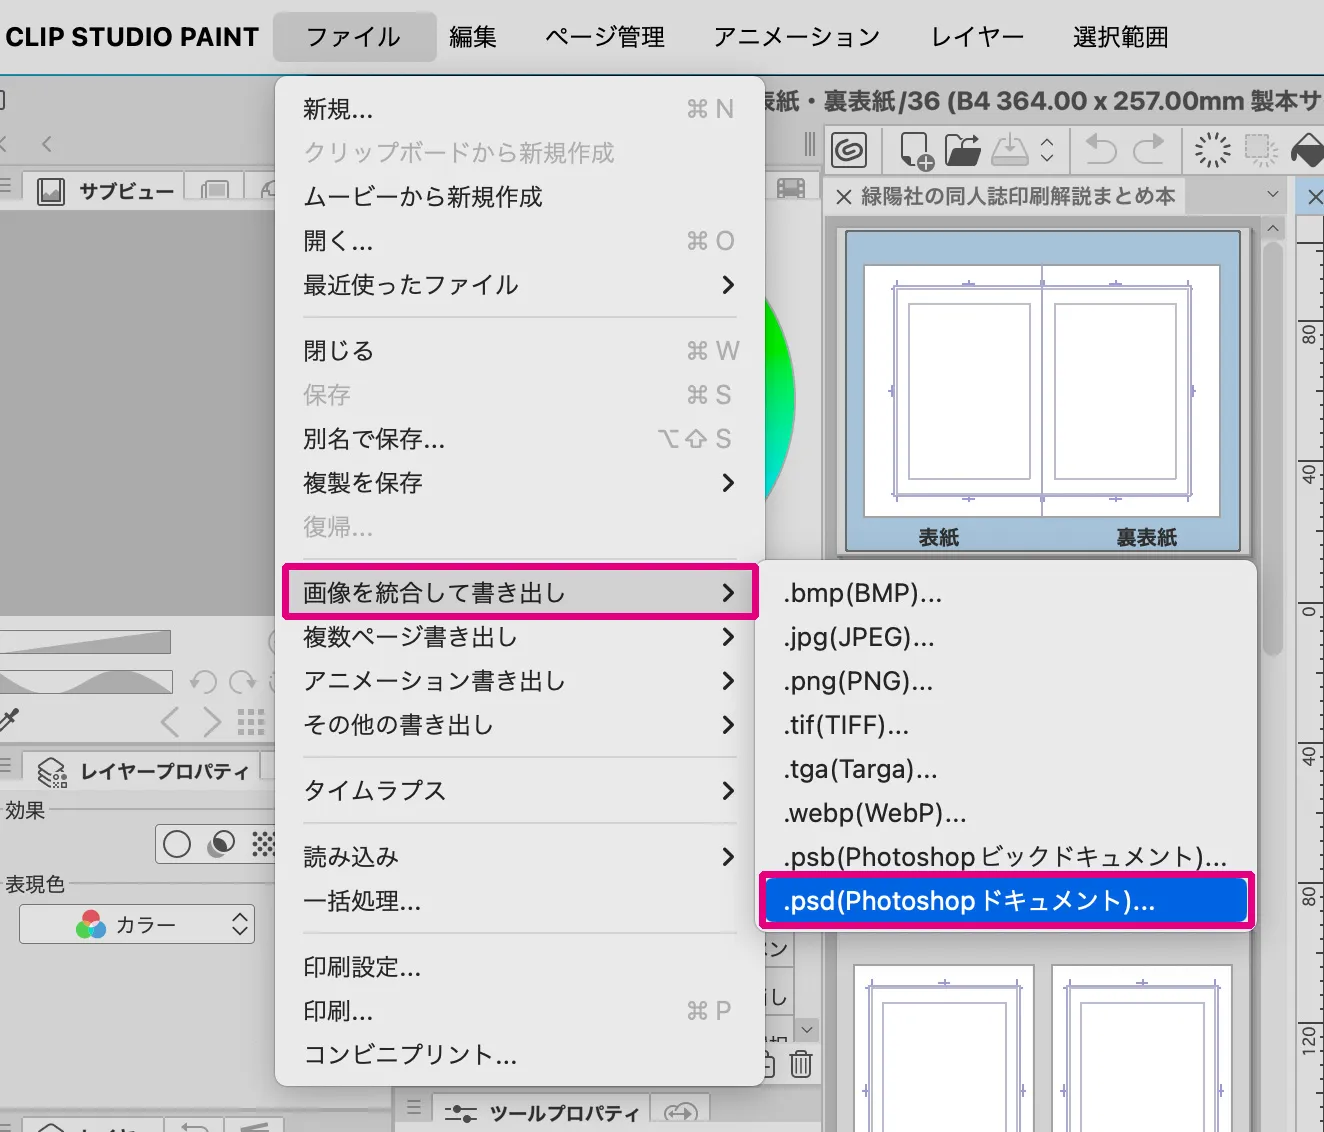
■How to Export Individually
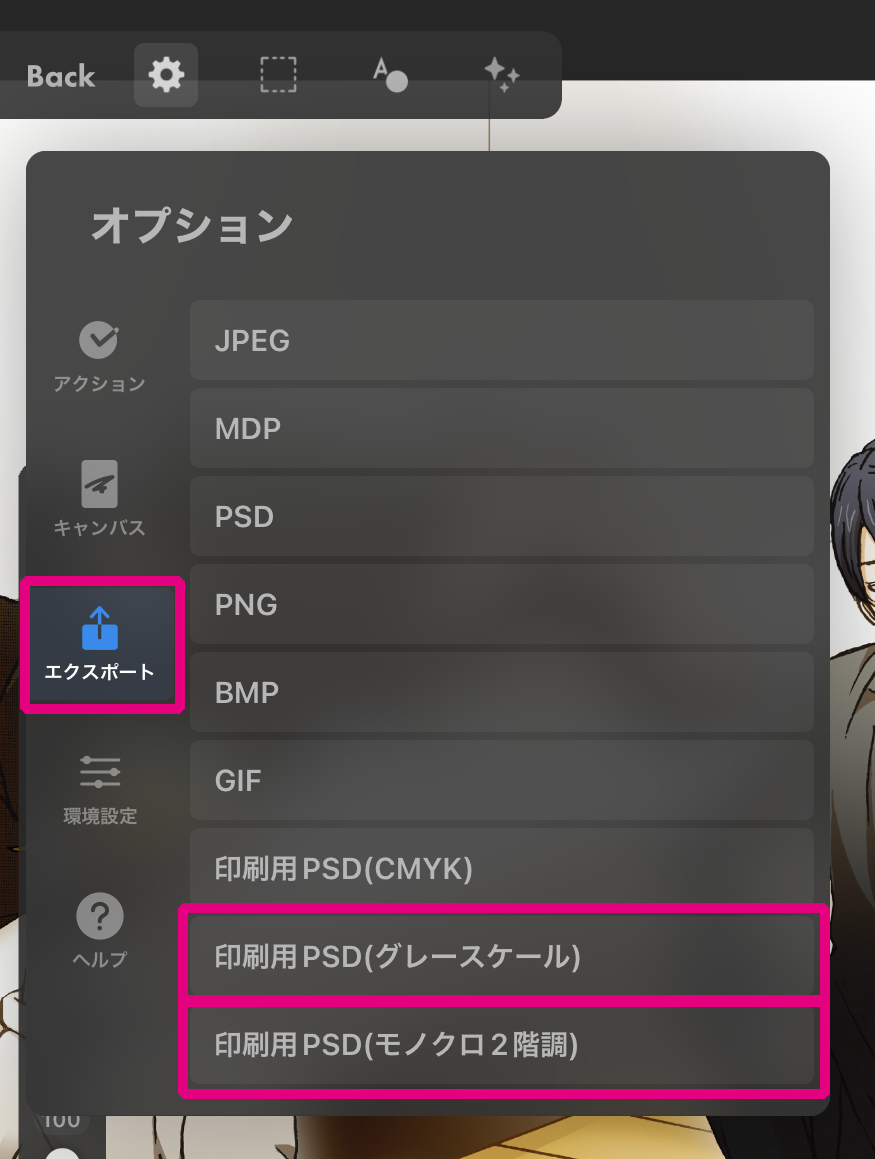
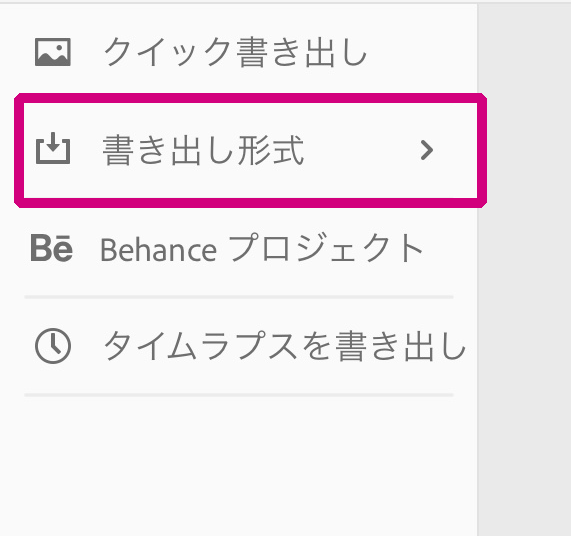
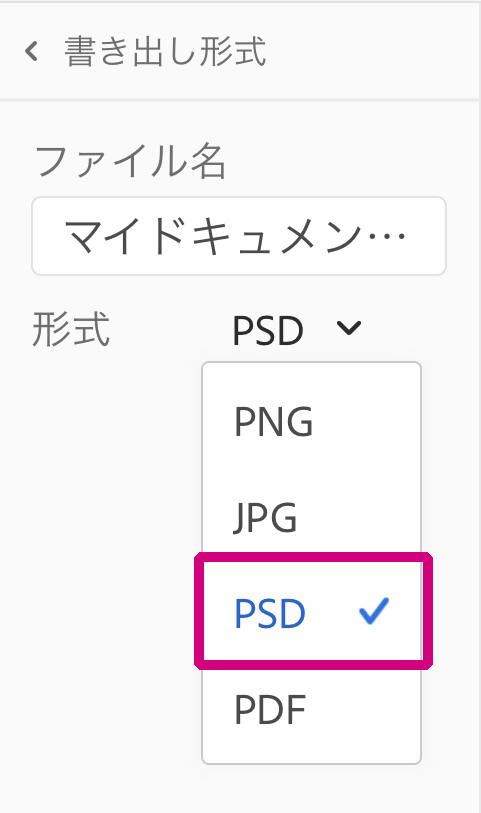
Open the [File] menu > [Export (Single Layer)] > [psd (Photoshop Document)…].
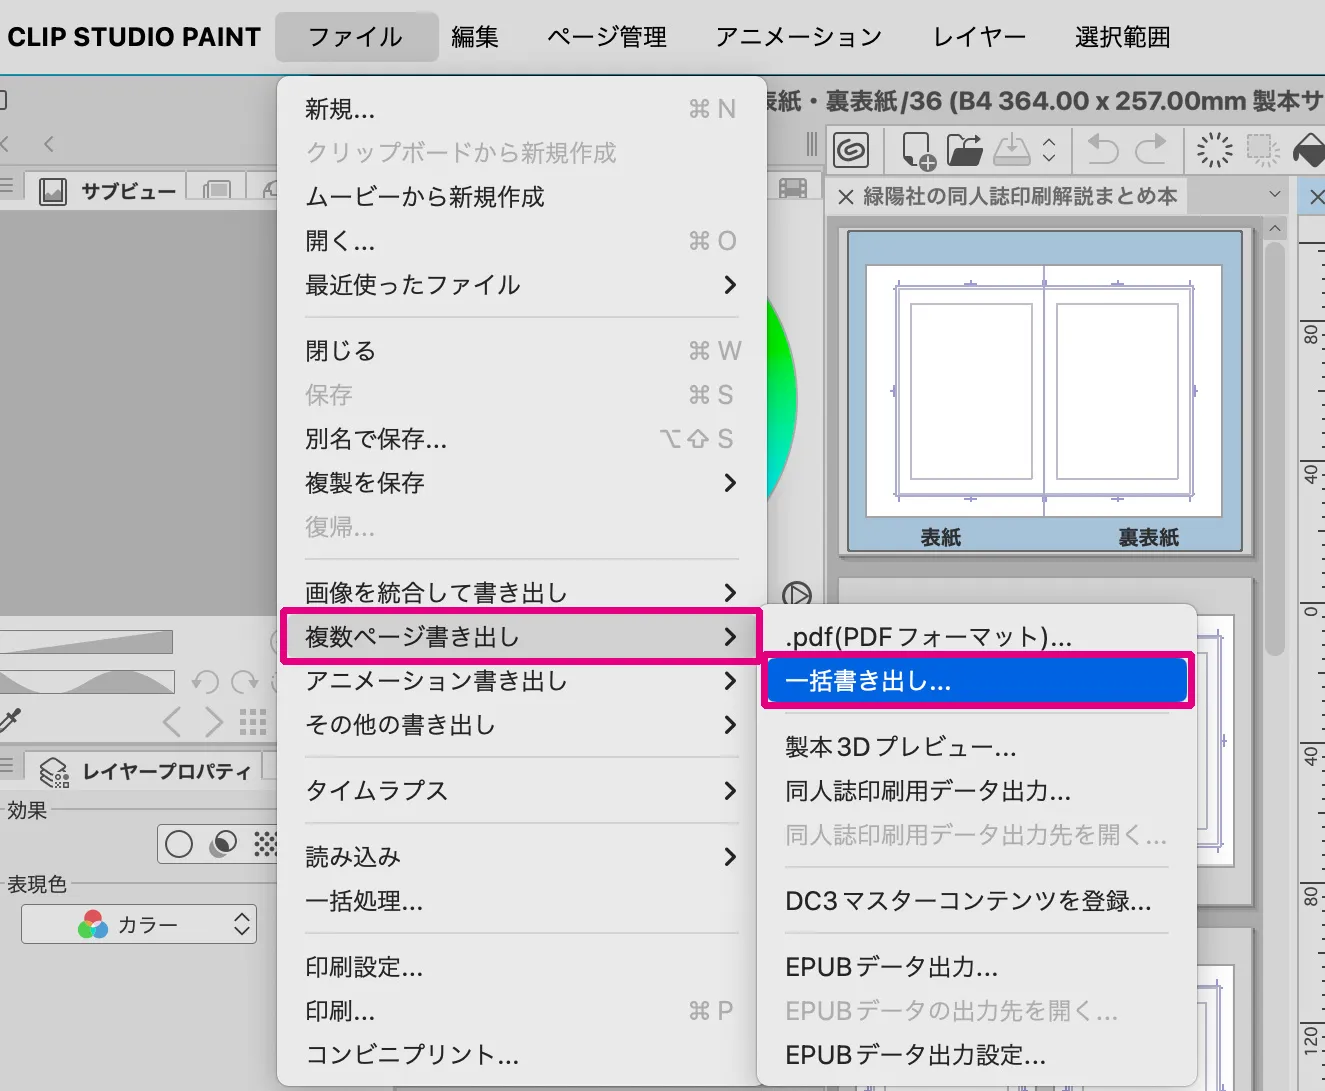
■How to export in a batch (CLIP STUDIO PAINT EX only)
Open the [File] menu > [Export multiple pages] > [Batch export…].
If you are handling a large number of pages, such as anthologies or compilations, we recommend the EX version, which has a batch export function! The EX version allows you to select and save data one at a time, saving you time and effort!
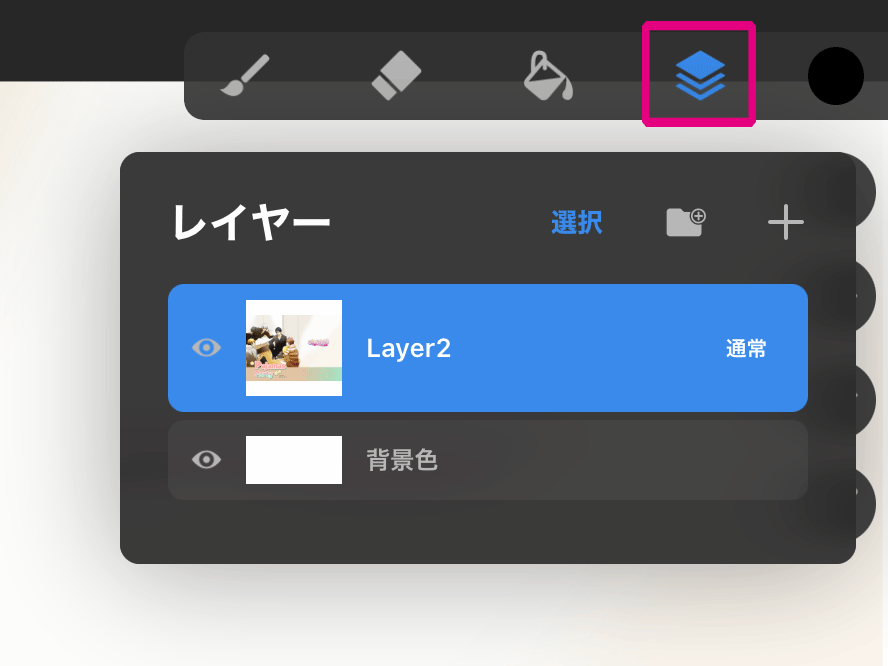
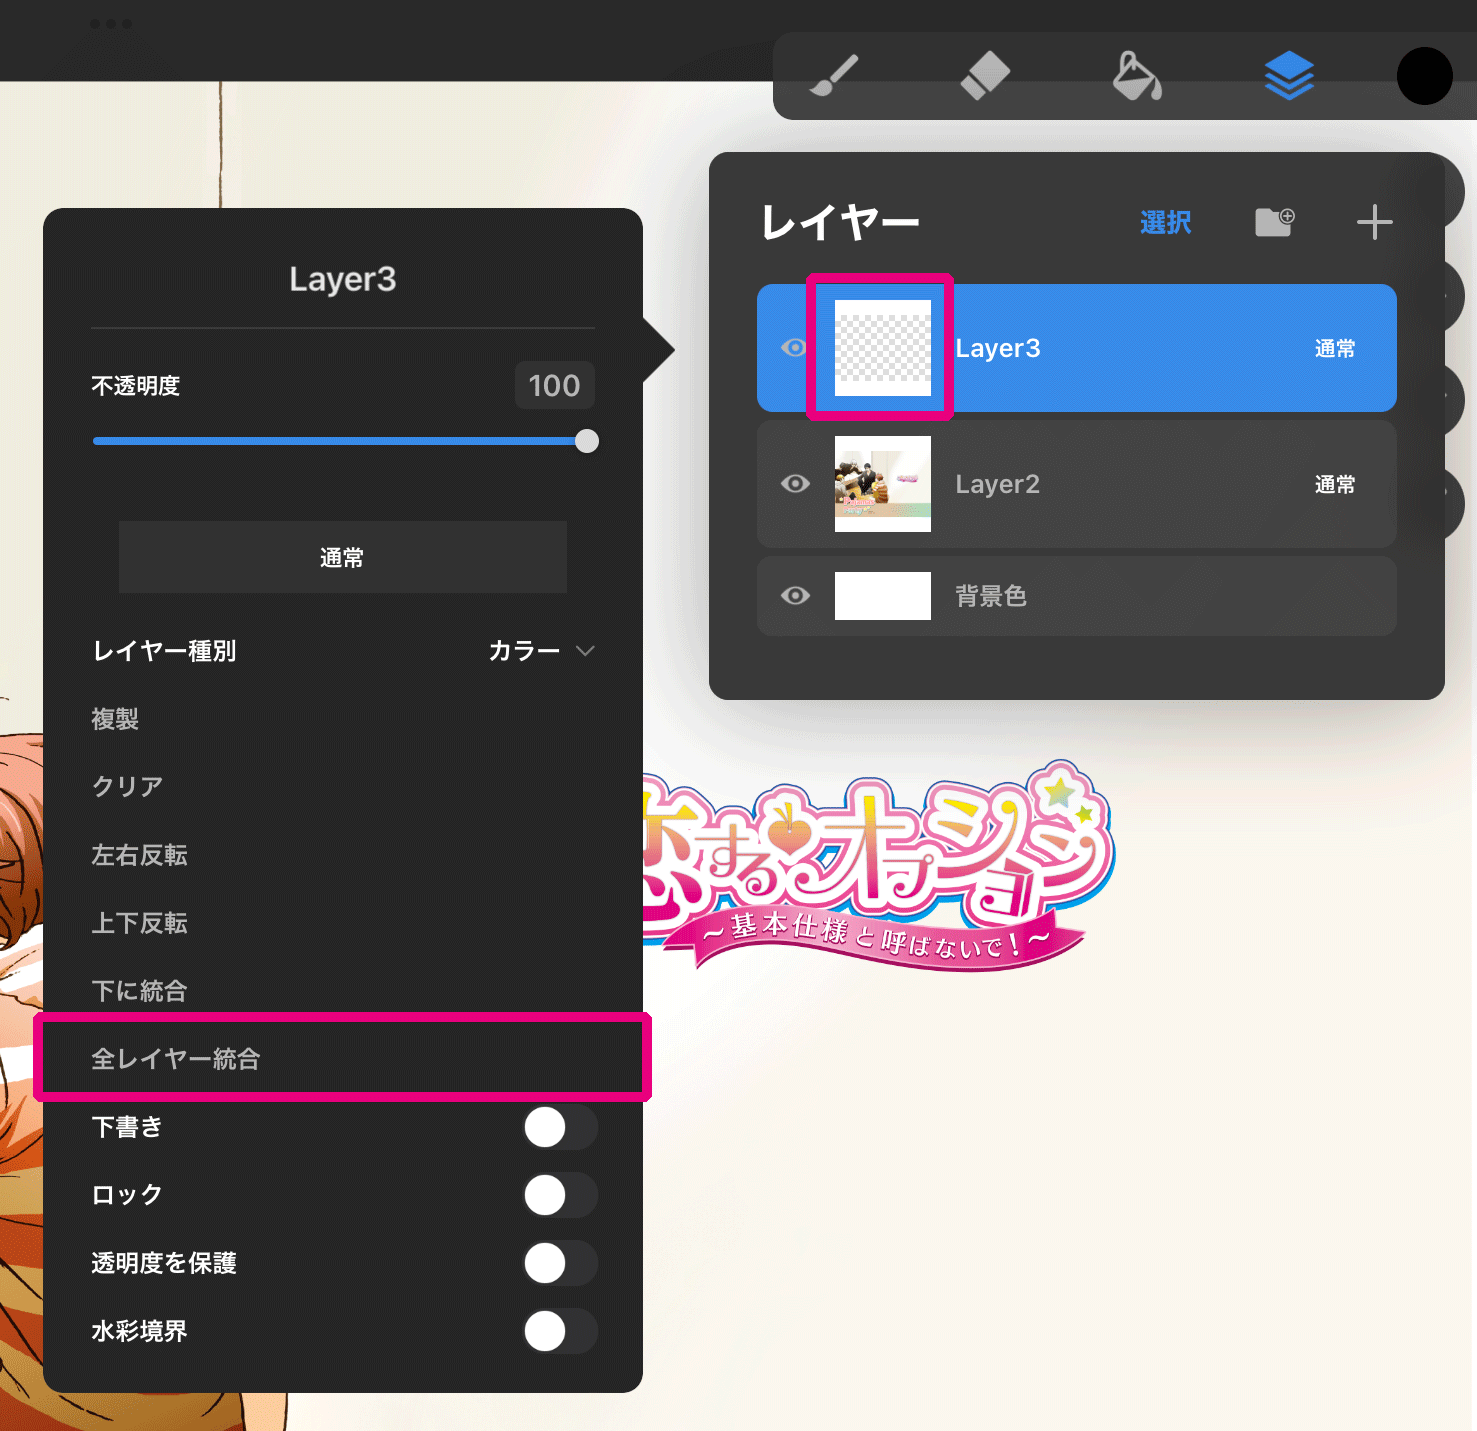
The data to be submitted is basically exported by integrating images. If you have prepared layers for special processing options such as hot stamping, glitter coat or pearl ink, please integrate all layers except for the layer for processing.
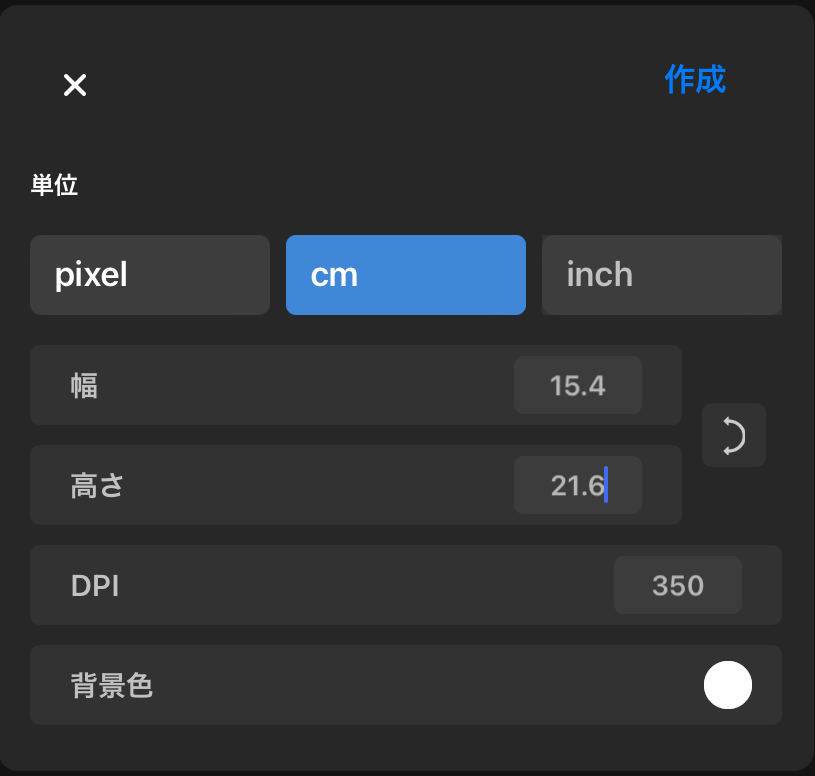
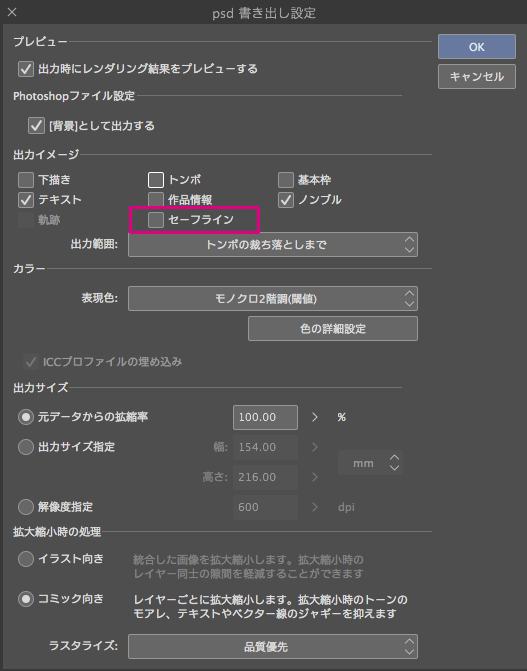
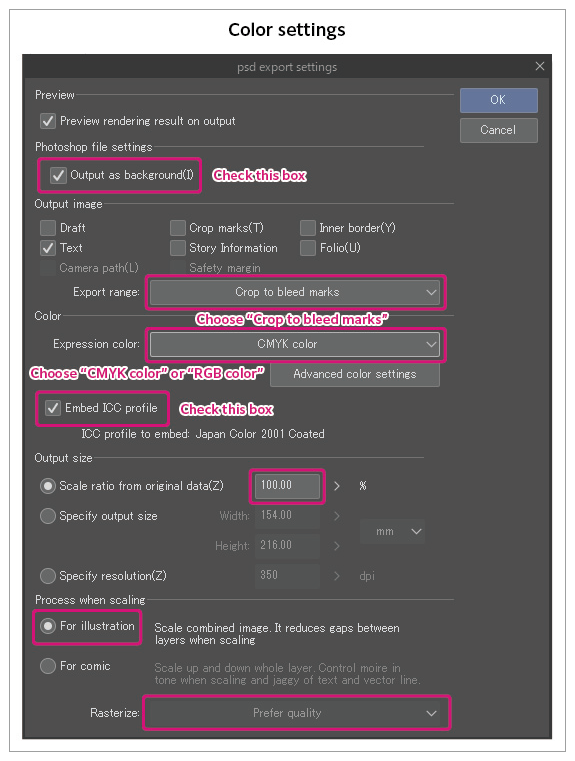
2.Export Settings
The images below are for exporting a color cover and monochrome text. Let’s go through the items in order from the top!
Color cover
Monochrome text
The images are the psd export settings of CLIP STUDIO EX confirmed with Ver.2.0.1.
[Photoshop file settings]
Check “Output as [background]”.
[Output image]
“Text”: If you are entering text, be sure to check it.
“Folio”… When writing the main text, be sure to check the box.
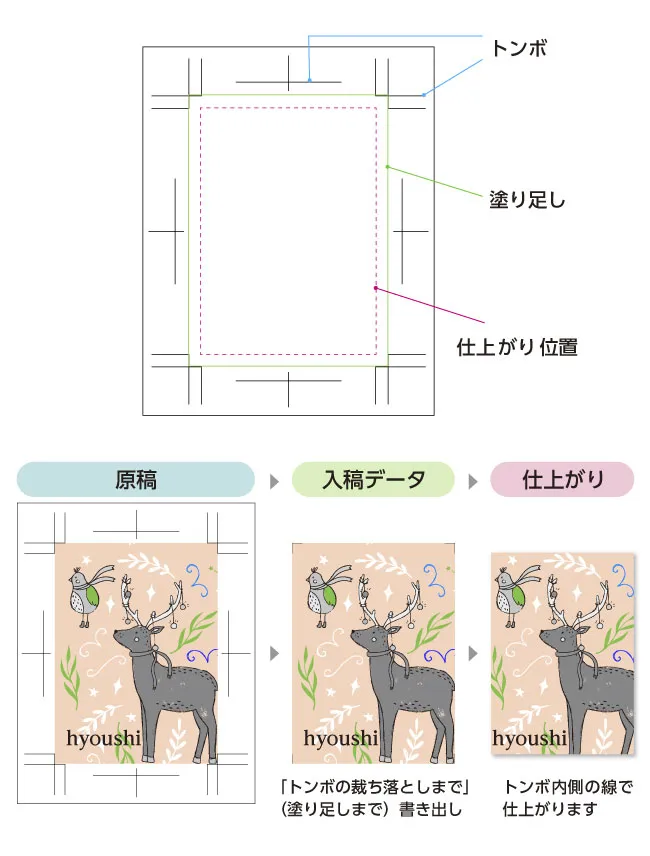
“Export range”… Select “Crop to bleed marks”.
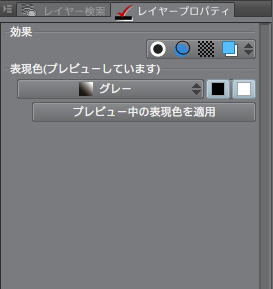
[Color]
“Expression color”… Select the desired color mode that matches the content of the document.
Check “Embed ICC profile”.
[Output Size]
Set to 100% scaling from original data.
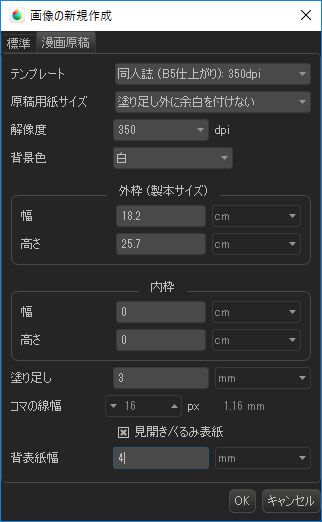
When changing the size of a book, such as a re-recorded book (compilation), select “Output Size” and set the size including the margin area.
[Processing when scaling]
For Rasterize, Select “Prefer quality”.
3.Items to note
There are two important items in the export settings. These are the expression color that determines the final color when saving, and the output size that determines the size of the exported file.
・Expression color
・Output size
Depending on the selection of the expression color and output size of the output image, the export result will change greatly. These items are important to consider when you are in a hurry before submitting an image. The following is a comparison of export results!
Expression Color
This item allows you to select the color mode of the original document.
Color mode is how colors are displayed on the data. For color printing, select RGB or CMYK mode. For single-color printing and text, choose grayscale or two-tone black-and-white.
[Expression color export pattern]
Full-color originals: RGB or CMYK
Single-color printing/black-and-white manuscript: grayscale or monochrome 2-tone
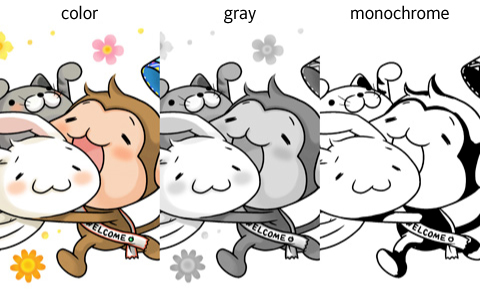
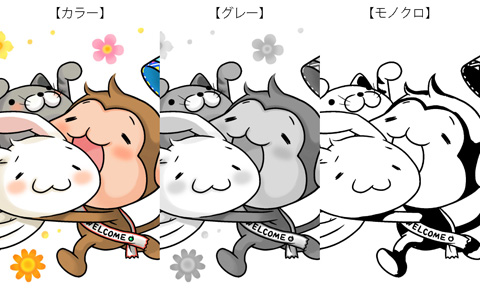
The image is an export comparison, with color, gray, and monochrome 2-tone (black-and-white) for the colors represented.
“Color”…Expressed in full color
“Gray”…Expressed between white and black including gray
“Monochrome”…Expressed in black-and-white only
Here are some common mistakes.
・ Save the expression color of the manuscript made in black as RGB or CMYK.
・ Save the data painted in gray as black-and-white.
With black-and-white printing, gray areas such as skin, clothes, and backgrounds are either white or black.
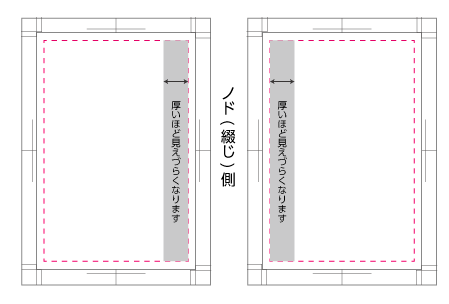
Output size
This item allows you to select the image size for export.
The settings are exported in the actual finished size plus the margin area.
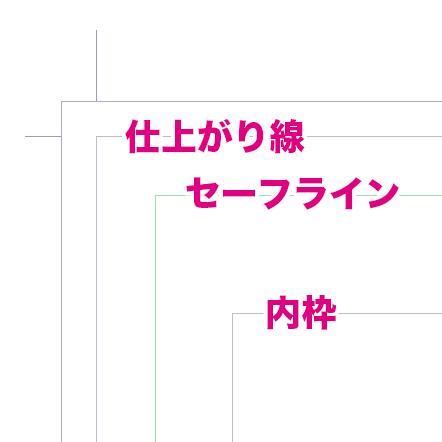
[Output range pattern]
“Export the entire page”…The entire image size is exported.
“Export up to bleed marks”… Output up to the finished size + margin area.
“Export to the inside of the register mark”: Export in the actual size of the finished size.
If you select “To the inside of the register mark “, the data will be written out in actual size, without the margin area that is necessary for bookbinding and cutting. This size cannot be used as data for printing.
We hope that you will remember this article and read it again before preparing and submitting your manuscript!
At Ryokuyousha, we handle a lot of data submitted in CLIP STUDIO PAINT. We look forward to receiving your doujinshi and goods submissions!
CLIP STUDIO PAINT(クリップスタジオペイント)で「失敗しない書き出し方法」をテーマに、原稿の完成から書き出しまでの流れ・設定・注意したい項目の3つをご紹介します。
このコラムでは、2025年7月29日公開のCLIP STUDIO PAINT EX最新バージョン(Ver.4.1)を使いながら解説します。
A. 基本的には「はい」。ただし、特殊加工がある場合は例外です。
印刷トラブル(レイヤーの表示崩れ、描画モードの不適合など)を防ぐため、入稿データは基本的に全てのレイヤーを統合した状態で書き出してください。
例外として、箔押しやNEONカラー、グリッターコートなどの特殊加工を希望し、そのための線画や塗りのレイヤーを分けている場合は、書き出しの際は、統合された表紙と特殊加工用のレイヤーが残るようにします。
例:箔押しのある原稿の場合→「箔押しデザインレイヤー」「印刷デザインレイヤー」2枚のレイヤーがある状態で入稿。
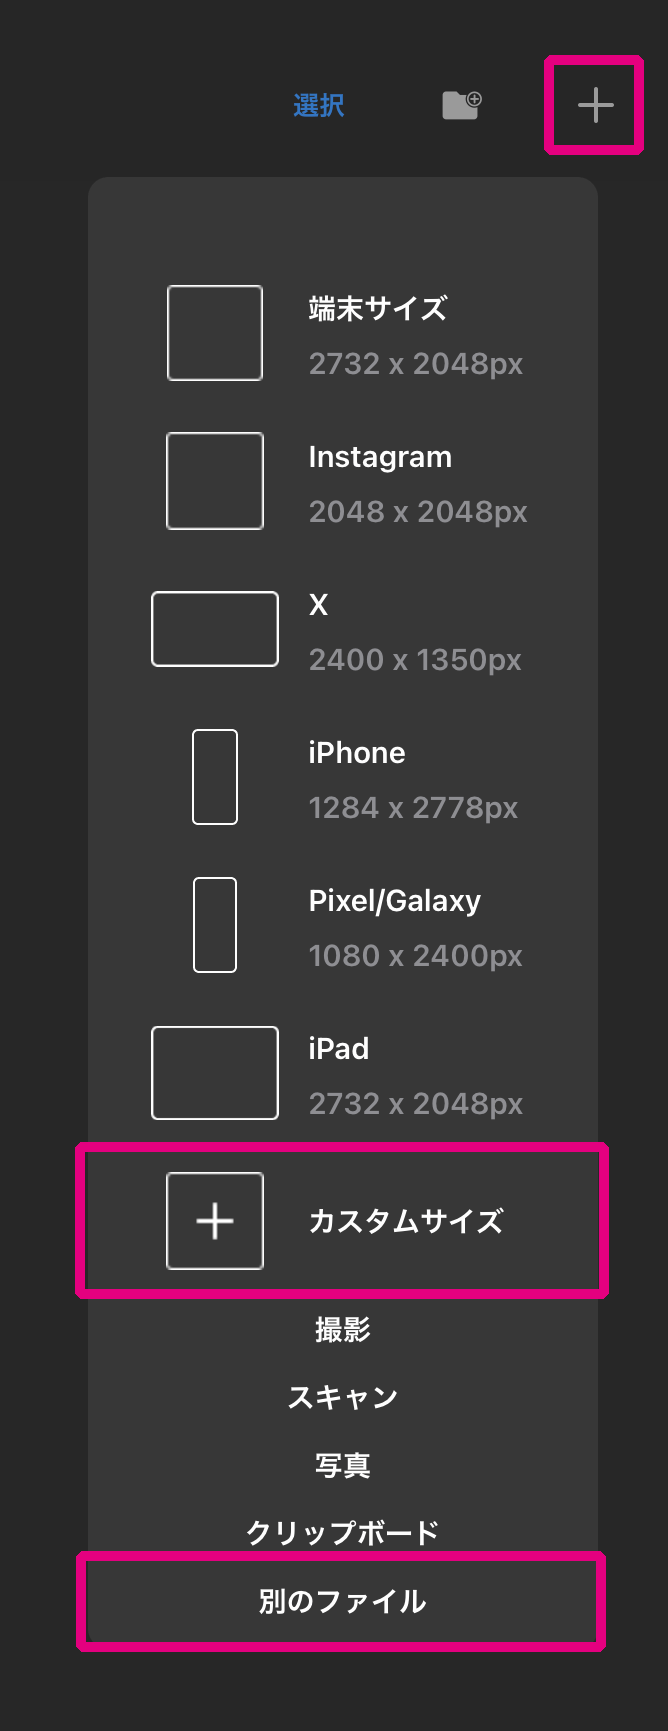
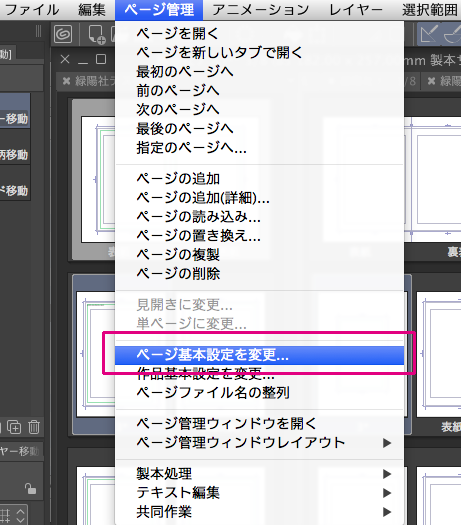
【保存方法】[ファイル]メニュー→「別名で保存」を選択します。
詳しくは 「CLIP STUDIO PAINTの特殊加工オプション表紙データの書き出し方法」をご覧ください。
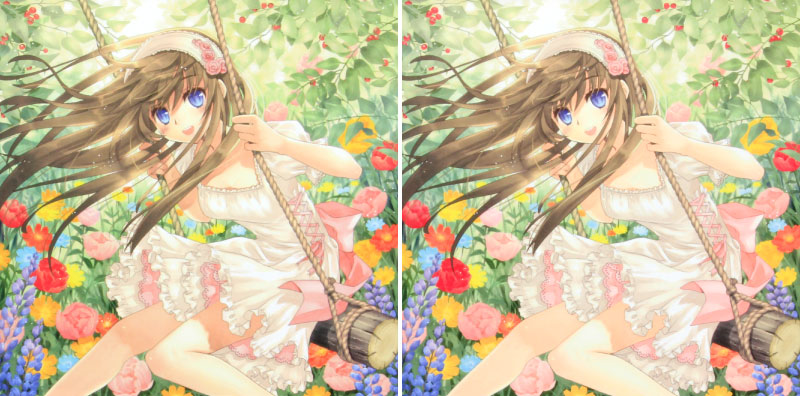
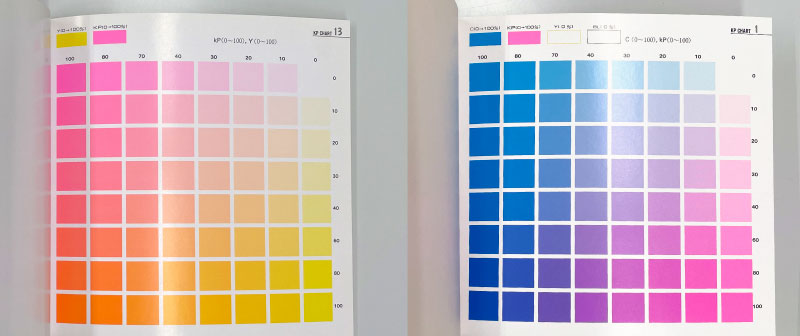
Q2. RGBで作ったデータをCMYKで書き出すと色がくすむのはなぜ?
A. 色域(表現できる色の範囲)の違いによるものです。
CLIP STUDIO PAINTの作業空間は基本的にRGB(光の三原色)ですが、印刷はCMYK(インクの四原色)で行われます。
RGBの方が表現できる色の範囲が広いため、特に鮮やかな色や蛍光色などは、CMYKに変換した際に表現できなくなり、くすんだり沈んだりして見えます。これは印刷の特性上避けられない現象です。
今回のコラムでは、CLIP STUDIO PAINTでの書き出し方法の基本から特に注意すべきポイント、そしてよくあるトラブルと解決策を解説しました。
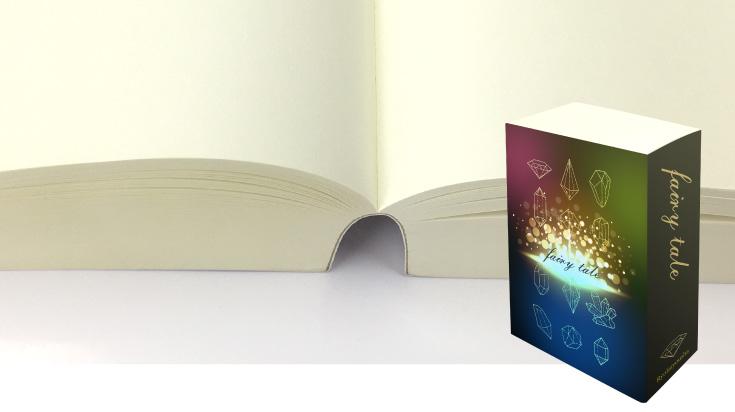
大切な作品を最高の品質で印刷するために、入稿前の書き出し設定は非常に重要です。このガイドが、あなたの同人誌・グッズ制作の一助となれば幸いです。
緑陽社では、CLIP STUDIO PAINTで作成された同人誌やグッズのデータを多数お取り扱いしています。初めての方も、経験者の方も、安心してご依頼いただけるよう専任のスタッフが徹底サポートいたします。
データ入稿に関してご不明な点がございましたら、お気軽にお問い合わせください。
皆様からのご入稿を心よりお待ちしております!